
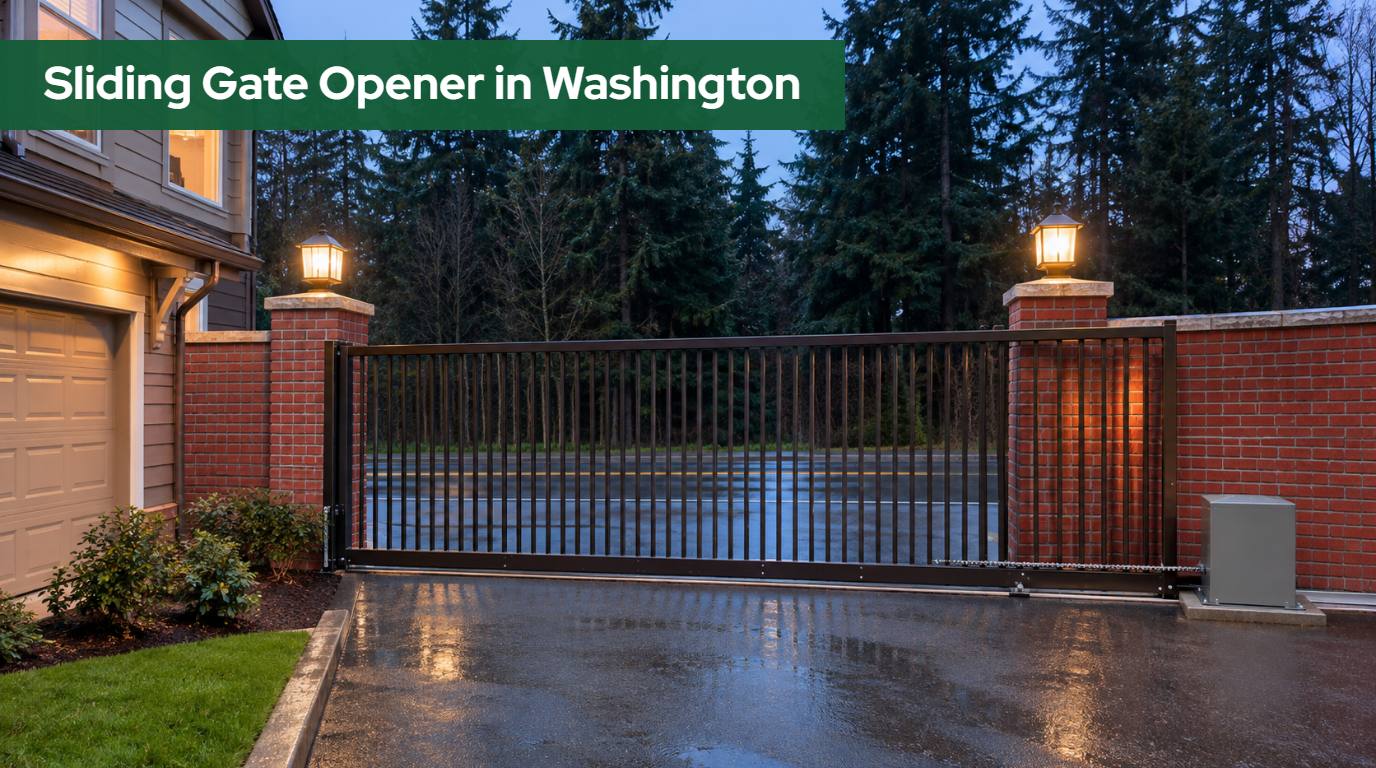
A sliding gate opener in Washington pulls a gate sideways along the fence line, which sounds simpler than swinging one through an arc. In practice the opener is only as good as the gate it moves. The gate has to roll freely on a level path, the drive has to stay lined up for the whole travel, and the system has to protect people at both ends of that travel, in a climate that drops fir needles, standing water and the odd hard frost into the gate’s path.
This guide explains how slide gate operators work, how chain drive and rack and pinion differ, how to size an opener by weight, travel and usage class, what the gate and the concrete pad need before a motor goes on, what UL 325 and ASTM F2200 ask of a slide gate, and how weather, power, fire access and state wiring rules shape the job. It is written for homeowners, farm owners, HOA boards and property managers across Northwest Washington.
Quick answer
A sliding gate opener in Washington is a pad-mounted motor that moves the gate with a chain or a rack and pinion. Pick it by gate weight, travel distance, UL 325 usage class and daily cycles, then confirm the gate rolls freely, has positive stops and screening, and gets monitored entrapment protection in both directions.
In this guide
- What a sliding gate opener in Washington does
- Chain drive or rack and pinion
- Track, cantilever and the gate behind the opener
- Sizing by weight, travel, class and cycles
- Is the gate ready for a motor?
- The operator pad and drive alignment
- UL 325 entrapment protection on a slide gate
- ASTM F2200: screening, gaps, rollers and stops
- Rain, debris, ice and wind
- Power, batteries and solar
- Power failure, manual release and fire access
- Access control, loops and timer to close
- Digging, wiring, permits and L&I
- Maintenance and common problems
- How we approach sliding gate openers
- Frequently asked questions
What a Sliding Gate Opener in Washington Does
A sliding gate opener, which the trade and the standards call a slide gate operator, is a motor and gearbox bolted to a concrete pad beside the gate. Its output turns a sprocket or a pinion. The sprocket pulls a chain fixed to both ends of the gate, or the pinion drives a toothed rack fixed along the gate, and the gate travels across the opening and back.
Unlike a swing gate opener, which works against the leverage of a long leaf, a slide opener mostly fights rolling resistance. That is why one modest motor can move a long, heavy gate, and also why anything that adds resistance shows up at once as a gate that stops, reverses or strains.
Slide gates suit sites where a swing arc will not fit. Common cases in Northwest Washington are short driveways off a county road, driveways that climb right behind the gate, and wide farm and commercial openings. If you are still choosing a gate type, our comparison of sliding gates versus swing gates in the Pacific Northwest covers space, slope and wind side by side, and our guide to the swing gate opener in Washington covers the other half of the decision.
Chain Drive or Rack and Pinion: How the Opener Moves the Gate
Chain drive. Most slide gate operators sold in the United States use roller chain. The chain is fastened to a bracket at each end of the gate and threads through the operator around a drive sprocket and idlers. When the sprocket turns, the gate is pulled along the chain. LiftMaster’s RSL12UL is a residential example: its installation manual lists 30 feet of number 41 chain in the carton and tells the installer to weld the front and rear brackets so the chain runs level with the idler pulley and parallel to the ground.
Chain is forgiving. It tolerates a little misalignment and a worn section can be replaced on site. Its weak points are sag, stretch and exposure to the weather.
Rack and pinion. A rack and pinion opener has a gear, the pinion, on the output shaft. It meshes with a toothed rack bolted or welded along the inside of the gate frame. FAAC’s 746 ER is a common example, sold in a rack version and a chain version. The drive is compact, with no chain to sag or stretch.
The price of that precision is alignment. FAAC’s 746 installation manual has the installer set the operator on thin 1/16 inch shims while the rack sections are fitted, then remove the shims to leave running clearance between the rack and the pinion. The weight of the gate must never rest on the pinion, and a gate that rises and falls along its travel, or a track that settles, closes that clearance.
| Question | Chain drive | Rack and pinion |
|---|---|---|
| How it connects to the gate | Chain bracketed to both ends of the gate, running through the operator | Toothed rack fixed along the gate frame, driven by a gear on the operator |
| Tolerance for an imperfect gate | More forgiving of small changes in height along the travel | Needs a constant gap between rack and pinion for the whole travel |
| What needs attention | Chain sag, stretch, lubrication, bracket bolts | Rack fasteners, tooth wear, debris packed in the teeth |
Track, Cantilever and the Gate Behind the Opener
The opener does not carry the gate. The gate’s own hardware does, and there are two main ways to do it.

Ground track. A V-track gate rolls on grooved wheels along a steel track fixed to a concrete strip across the driveway. The track carries the weight, so the tail beyond the opening can be short. The cost is a strip of steel across the drive that has to stay clean and level. FAAC states the 746’s weight rating on that assumption: the manual says the maximum weight figure assumes high-quality, lubricated bearing rollers on a level V track.
Cantilever. A cantilever gate hangs from rollers mounted on posts beside the driveway and never touches the ground across the opening. Nothing crosses the drive, which is why cantilever gates do well on gravel and in leaf fall. The cost is a counterbalance section beyond the opening and stout posts to carry it. We cover that design in our guide to cantilever gate installation in Washington.
Either way, a slide gate needs a clear run beside the opening at least as long as the gate itself, in line with the fence. On a tight frontage that run-back space is usually the deciding measurement, and our guide to driveway gate width and layout in Washington explains how to size the opening first. Where the ground rises or falls along the fence line, the gate still has to travel level; our guide to the driveway gate on a slope shows what that means for a slide gate.
Sizing the Opener by Weight, Travel, Class and Cycles
Every slide gate operator carries a published limit for gate weight and for gate length or travel distance. What matters is total weight, how far the gate travels and how often.
The figures below come from the manufacturer documents we reviewed. They are examples of how ratings are stated, not a ranking.
| Opener (source) | Weight and length rating | Usage class and duty stated | Temperature range stated |
|---|---|---|---|
| LiftMaster RSL12UL (installation manual) | 800 lb maximum gate weight; 50 ft maximum travel distance | UL 325 Class I and II; 120 cycles per day; 12 inches per second | -4°F to 140°F; down to -40°F with the optional heater |
| Viking K-2 (specification sheet) | 700 lb and 30 ft | Class I, III and IV; 100 percent continuous duty; 12 inches per second | -20°F to 158°F, with a built-in heater |
| FAAC 746 ER (specification sheet) | 1,400 lb with the Z16 pinion; 900 lb with the Z20 pinion | Residential and condominium use; 70 percent use frequency | -4°F to 131°F |
Three points decide the choice.
- Real gate weight. Weigh the gate or calculate it from the drawings, including cladding. A cedar-clad steel frame weighs far more than the same frame with pickets.
- UL 325 usage class. Class I covers residential use, Class II commercial or general access such as an apartment or HOA entrance, Class III industrial or limited access, and Class IV restricted access. A light gate at a community entrance still needs an operator listed for that class.
- Daily cycles. A storage facility or a shared road can cycle a gate more in an hour than a house does in a day. Compare the count with the operator’s stated cycle or duty rating.
The FAAC row shows speed traded against pulling force: the same motor carries 1,400 pounds with the smaller pinion and 900 pounds with the larger, faster one. Our gate operator comparison for Northwest Washington explains how the brands and classes line up, and when a rating is borderline the answer is the next size up, never a higher force setting.
Not sure what your slide gate weighs?
We measure the gate, the travel and the run-back space on site, work out the weight and the usage class, and tell you which openers actually fit.
Is the Gate Ready for a Motor?
The quickest test of a slide gate costs nothing. Disconnect any existing drive, then push the gate by hand through its full travel in both directions. It should roll at an even effort and stay where you leave it. LiftMaster’s RSL12UL manual puts the requirement in one line: the gate must be properly installed and work freely in both directions before the operator goes on.
What we look for on an existing gate:
- Even rolling effort. A tight spot means a bent track, a flat-spotted wheel, a dragging guide or a bowed frame. The opener’s obstruction sensing will read that spot as a person.
- No movement by gravity. If the gate creeps downhill when released, the path is not level. ASTM F2200 requires a gate that will not start moving by gravity when the operator is disconnected.
- Straight, stiff frame. A gate that bows sideways misses its receiver, and one that sags changes the chain line or the rack gap as it travels.
- Stops at both ends. The gate needs physical stops that it cannot roll past, covered in the standards section below.
- Posts that do not move. On a cantilever gate the roller posts carry everything. Our guide to gate post installation in Washington covers footing depth and drainage.
A manual gate that passes these checks is a good candidate for a retrofit, and our page on automating an existing gate explains what that involves. One that fails needs gate work first. DASMA’s rationale notes that an existing gate being automated, or getting a new operator, may need to be upgraded to the current construction standard.
The Operator Pad, Position and Drive Alignment
A slide operator sits on its own concrete pad, inside the fence line, beside the gate’s path. Every start and stop of the gate reacts against it. LiftMaster recommends reinforced concrete for the RSL12UL pad and tells the installer to run the conduit before the pour.
Front or rear position. The RSL12UL manual shows two layouts. In the standard installation the operator sits near the front roller of the gate, next to the opening. In a rear installation it sits near the back of the gate as measured in the open position. The rear position keeps the operator away from the driveway edge, which helps where vehicles cut the corner.
Distance from the gate. The same manual calls for at least 4 inches of space between the gate and the output sprocket.
Chain tension. LiftMaster allows no more than 1 inch of sag for every 10 feet of chain. A slack chain slaps the gate and jumps teeth. An overtight chain loads the sprocket bearings.
Drainage. The pad should stand proud of the surrounding grade, so water drains away from the chassis instead of pooling under it. In the wet season in Western Washington, low ground beside a driveway holds water for weeks, so where a low spot is unavoidable the pad is raised.
Limits. The open and close positions are set just short of the positive stops. LiftMaster’s troubleshooting notes warn against setting a limit too tightly against a hard stop.
UL 325 Entrapment Protection on a Slide Gate
A slide gate creates hazards in both directions of travel. Closing, the leading edge runs toward the receiver post. Opening, the trailing end runs back along the fence, past posts and the operator. LiftMaster’s RSL12UL manual, quoting the UL 325 requirements, defines a slide gate entrapment zone this way: one exists if, at any point during travel, the gap between the gate and any opposing fixed edge or surface, such as posts, walls, pillars, columns or the operator itself, is less than 16 inches in a location up to 6 feet above grade.

The rules that follow from that definition:
- Two directions, at least two devices. The manual states that slide gate operators need a minimum of two external monitored entrapment protection devices to function, one for the open direction and one for the close direction.
- Every zone, not only the opening. On many sites the forgotten zone is at the back, where the opening gate closes the gap to a fence post or a building wall.
- Photo eyes across the opening and the run-back. A photo eye across the driveway guards the closing path. A second beam along the back of the gate guards the opening direction. Our guide to gate photo eye installation in Washington covers heights and placement.
- Edges where a beam cannot see. The manual places contact sensors at the leading edge, the trailing edge and post-mounted both inside and outside a horizontal slide gate where the risk exists. Our guide to the gate safety edge in Washington explains the types and wiring.
- The motor’s own sensing is not enough. FAAC’s 746 manual says plainly that the operator’s built-in anti-crush feature should not be considered adequate protection, and that photocells and reversing edges must be installed.
The manuals add site rules that apply to every automated gate: the gate is for vehicles only, people on foot need a separate entrance, access controls go at least 6 feet from any moving part where nobody can reach through the gate to use them, and at least two warning signs are posted, one visible from each side.
ASTM F2200: Screening, Gaps, Rollers and Stops
UL 325 covers the operator. ASTM F2200 covers the gate itself, and it has a section written only for horizontal slide gates. Operator manuals reprint it, and DASMA publishes the reasoning behind each clause in its rationale for ASTM F2200 (Technical Data Sheet 370). For Class I, II and III gates the requirements are:
| Requirement | What the standard says | Why it exists |
|---|---|---|
| Screening | Openings are guarded or screened from the bottom of the gate to the top, or to at least 6 feet above grade, whichever is less, so a 2 1/4 inch sphere cannot pass, on the gate and on the part of the fence the open gate covers | Stops an arm reaching through a moving gate. The height was raised from 48 to 72 inches in the 2011 revision |
| Gap at the post | The gap between the gate frame and the nearest fixed object, such as the support post, is no more than 2 1/4 inches with the gate fully open or fully closed | DASMA cites injury records from 1985 to 2001 in which people riding an opening slide gate were pulled into the gap between gate and post |
| Roller guards | All weight-bearing exposed rollers 8 feet or less above grade are guarded or covered | Keeps hands away from rollers and bearings |
| Positive stops | Stops limit travel to the designed fully open and fully closed positions, fitted at the top or the bottom of the gate | A gate driven past its supporting hardware can fall |
| Lateral stability | The gate is stiff enough sideways to enter its receiver guide | Wind can bend a slide gate out of plumb during travel |
Two general clauses matter just as much. The gate must not be able to fall over more than 45 degrees from vertical if it comes off its hardware. And it must not have protrusions: DASMA says a manual latch should be removed before a gate is automated and replaced, where needed, with a receiver guide.
Screening is the item most often missing on ornamental slide gates. A picket gate with 4 inch spacing does not pass a 2 1/4 inch sphere test, so it gets a mesh or perforated panel, and so does the fence panel it slides behind. Our guide to automatic gate safety standards, UL 325 and ASTM F2200 explains how the two standards fit together.
Does your slide gate meet the current standard?
We check the screening, the post gaps, the roller guards, the stops and every entrapment zone, then list what the gate needs before or with a new opener.
Rain, Debris, Ice and Wind in Western Washington
Debris on the track. A V-track is a gutter across the driveway. In fall it collects fir needles, maple leaves, cones and gravel. A wheel that climbs over a cone lifts the gate, and on a rack drive that closes the rack gap. Track gates in wooded parts of Skagit, Whatcom and Snohomish counties need sweeping as routine, and sites with heavy leaf fall are often better served by a cantilever gate.
Standing water and ice. Water that sits on a track freezes on the few hard nights each winter and holds the wheels. A track set slightly proud of the driveway with drainage on both sides sheds water; a track set in a dip does not.
Rain on the drive. Chain and rack live in the weather. Rain washes lubricant off chain, and grit sticks to what is left. LiftMaster’s maintenance notes are specific: use only lithium spray on the chain, never grease or silicone spray.
Cold. The operating ranges in the sizing table cover a normal Western Washington winter. Batteries are the weaker link. LiftMaster’s manual says batteries do not perform well in extremely cold temperatures, and foothill properties east of Sedro-Woolley and Arlington see more of those nights than the lowlands do.
Wind. A slide gate hides behind the fence when open and presents its full face only when closed or moving, which makes it a better choice than a long swing leaf on exposed ground such as the Skagit flats or a Whidbey Island bluff. A solid slide gate still takes a side load in a gale, which is why the receiver guide and lateral stiffness matter. Our guide to driveway gates for windy areas in Washington covers design for those sites.
Power, Batteries and Solar
Slide operators fall into two power families. Line-voltage operators run the motor directly from a 120 or 230 volt supply; the FAAC 746 ER is a 230 volt unit. Battery-run operators use a low-voltage DC motor fed by batteries that a charger keeps full. The RSL12UL runs on 12 volts DC from a battery charged by its 120 volt supply, and the Viking K-2 runs a 24 volt DC motor with two 12 volt batteries behind it.
The battery-run design has a practical advantage in this region: the gate does not notice a short outage. Viking’s specification sheet lists 100 full cycles on battery backup for the K-2. LiftMaster allows a 33 amp-hour battery in place of the RSL12UL’s standard 7 amp-hour one.
Solar deserves a careful read of the manual. The RSL12UL accepts up to 30 watts of solar, with a minimum of one 10 watt panel and a maximum of three. The same manual says solar-powered installations are not supported in northern climates because of cold weather and reduced hours of winter sunlight, and that solar panels cannot be installed in areas with long periods of heavy fog, lake effect snow or rain. It also says a heater cannot be used with a solar application.
That does not rule out every solar slide gate in Washington, but a solar plan here has to be checked against the specific operator’s solar chart and the site’s December sun, not assumed. Panels face due south, and trees that do not shade the panel in summer may shade it in winter when the sun sits lower. Where utility power can reach the gate, it is usually the stronger choice for a slide gate that cycles often. Our guide to solar gate openers in Washington covers the sizing questions in detail.
Power Failure, Manual Release and Fire Access in Washington
Every slide gate needs a decided answer to one question: what does the gate do when the power and the battery are both gone? The RSL12UL manual describes the choices on its board. With AC power off and the battery critically low, below 11.5 volts, the gate latches at a limit. A selector can force the gate to open automatically and stay at the open limit until power returns, or to stay at the close limit. A separate backdrive switch decides whether the dead gate can be pushed by hand or resists being pushed.
Line-voltage gear drives raise a different point. FAAC describes the 746 as a non-reversing operator that holds the gate shut without an electric lock. That is good for security, and it means the gate cannot be pushed open in an outage without the key-protected manual release. Everyone who depends on the gate needs to know where that release is, and to use it only when the gate is not moving.
For shared roads and commercial sites, the answer is partly set by the fire code. Washington adopts the International Fire Code with state amendments in chapter 51-54A WAC. The state’s version of section 503, WAC 51-54A-0503, says fire apparatus access roads are provided and maintained according to locally adopted street, road and access standards, so the details come from the local fire marshal. The model code’s gate provisions, as local agencies reproduce them, require electric operators to be listed to UL 325 and automatic gates to meet ASTM F2200.
For a slide gate the usual local questions are clear width with the gate fully open, the emergency opening device, and power-failure behavior. Some agencies want the gate to open by itself when power is lost, which is the fail-open setting described above. Our guide to fire department gate access in Washington compares what several agencies ask for, and our guide to automatic gate battery backup in Skagit County covers outage planning.
Access Control, Vehicle Loops and Timer to Close
A slide gate takes the same entry devices as any automated gate: remotes, keypads, intercoms, telephone entry, card readers and license plate recognition. Our access control systems page compares them. Three points are specific to slides.
Where the pedestal goes. The 6 foot rule is measured from any moving part of the gate, and on a slide gate the moving part includes the tail as it runs back along the fence. A keypad on the inside for exiting drivers must not sit beside the run-back path.
Loops keep the gate off vehicles. A long vehicle can still be in the opening when a timer runs out. LiftMaster’s manual recommends vehicle loops and suggests them for vehicles 14 feet or longer, which in farm country means every truck and trailer. Our guide to the gate loop detector in Washington explains the layouts.
Timer to close. On the RSL12UL the timer ranges from 0 to 180 seconds and ships switched off, and it resets when an open control, a loop, a close edge or a close photo eye is triggered. A timer is only as safe as the detection behind it, which is the reason loops and eyes are planned before the timer is turned on.
Planning the opener, loops and keypad together?
We draw the gate travel, the entrapment zones, the loops and the pedestal on one site plan, so each device sits where the standards and your driveway allow.
Digging, Wiring, Permits and L&I
Call before digging. Washington’s underground utility law, chapter 19.122 RCW, requires an excavator to notify the one-number locator service, reached at 811, at least two full business days and not more than 10 full business days before digging, unless an exemption applies.
Conduit and cable. Low-voltage wiring to eyes, edges and keypads runs in its own conduit, apart from line voltage. LiftMaster specifies power-limited cable such as type CL2 for the external devices, and an earth ground rod within 3 feet of the operator. If the driveway is about to be paved, the conduits go in first; our guide to automatic gate planning before paving in Burlington, WA shows what to lay in.
Who may wire it. Washington regulates gate operator wiring. Under WAC 296-46B-920, the Department of Labor and Industries recognizes a door, gate and similar systems specialty, specialty (10), whose holders may install, service and repair gate operator wiring and equipment within the limits the rule sets. The circuit that feeds a hardwired operator from the electrical panel is outside that specialty and belongs to an electrical contractor licensed for it. Electrical work on a gate motor generally needs an electrical permit, from L&I or from the city where the city runs its own inspections. Our guide to gate opener wiring in Washington covers permits, wire sizing and burial depth.
Other permits. Fence height limits, sight triangles at the road and fire access review can all apply to a new gate. Our guide to gate permits in Washington State explains how those reviews work in the counties we serve.
Maintenance and Common Problems
The RSL12UL manual’s maintenance chart is a fair model for any chain-driven slide gate. It covers the entrapment protection devices, the warning signs, the manual disconnect, the chain and sprockets, the gate itself, the wiring and the mounting bolts. It also says the limits may need to be reset after any major chain adjustment, and that batteries should be replaced about every three years.
A practical routine for a residential slide gate in this climate:
- Monthly: sweep the track or the roller path, break each photo eye beam during travel and press each edge, and confirm the gate stops and reverses.
- Each season: check chain sag and lubricate, check rack bolts and teeth, spin the wheels and guide rollers, and check the stops and the receiver guide.
- Before winter: test the battery, clear drainage beside the track, cut back branches over the run-back area, and practice the manual release.
| Symptom | Likely causes on a slide gate |
|---|---|
| Gate stops and reverses partway | Debris on the track, a seized wheel, a dirty or misaligned photo eye, a damaged edge cable |
| Gate stops short of closed or runs into the stop | Chain adjusted without resetting limits, a stretched chain, a loose limit plate on a rack drive |
| Grinding on a rack drive | Gate weight resting on the pinion after the track settled, packed debris in the rack, loose rack section |
| Gate will not move, operator beeps | Low battery, or a monitored safety device that has failed its check |
Our automatic gate troubleshooting guide walks through those checks in order, our seasonal automatic gate maintenance guide for Washington sets the calendar, and our LiftMaster and Viking gate opener repair page covers brand-specific service. When the repair list grows long, our guide to how long automatic gates last in Washington helps weigh repair against replacement.
How We Approach Sliding Gate Openers
Emerald Gate Systems designs, fabricates, installs, automates and services gates from our shop at 7557 Alpine Lane in Sedro-Woolley, Washington, and works across Skagit, Whatcom, Snohomish, Island, San Juan, King and Pierce counties. One team handles CAD planning, welding, installation, automation, access control, testing and future service. On a slide gate, that means the frame, the screening, the stops, the roller posts and the operator pad are decided together.
A sliding gate opener project with us starts with a free on-site consultation. We measure the opening, the run-back space and the grade along the fence line, roll an existing gate by hand through its travel, check the track or the roller posts, look at drainage, tree cover and wind exposure, and find where power can come from. Then we recommend the gate type, the opener and drive, the entrapment protection plan, the access control and the power-failure setting, and we confirm fire access requirements with the local fire marshal where they apply. We install and service LiftMaster, Viking and FAAC operators and access control equipment including keypads, intercoms, telephone entry, card readers and license plate recognition. Before we leave, we test every safety device, the limits, the force setting, the power-failure behavior and the manual release, and show you how each one works. Our automatic gate installation page explains the full process.
Washington requires contractors to show their registration in advertising: Emerald Gate Systems is registered with the Washington State Department of Labor and Industries as a construction contractor (EMERAGS748D6) and holds an electrical contractor license in the Doors and Gates specialty (EMERAGS747KE).
Frequently Asked Questions
How does a sliding gate opener work?
A motor on a concrete pad beside the gate turns a sprocket or a gear. The sprocket pulls a chain fastened to both ends of the gate, or the gear drives a toothed rack fixed along the frame, and the gate rolls across the opening. A control board sets the open and close limits, the reversing force and the safety device inputs.
Is chain drive or rack and pinion better for a slide gate?
Neither is better everywhere. Chain drive tolerates small changes in gate height along the travel and suits most residential, commercial and cantilever gates, but the chain needs tension and lubrication. Rack and pinion is compact with no chain to sag, but it needs a constant gap between rack and gear, which means a true, level track.
How heavy a gate can a sliding gate opener move?
It depends on the model, so read the rating. In the documents we reviewed, LiftMaster’s residential RSL12UL lists an 800 pound maximum gate weight, Viking’s K-2 lists 700 pounds and 30 feet, and FAAC’s 746 ER lists 900 or 1,400 pounds depending on the pinion. Weigh the gate, then match usage class and daily cycles too.
Can I put an opener on my existing sliding gate?
Often yes, if the gate rolls freely by hand in both directions, stays put when released, and has sound rollers, guides and posts. Expect upgrades as part of the job: positive stops, roller guards, mesh screening to the height ASTM F2200 sets, removal of the old manual latch, and monitored photo eyes or edges for both directions of travel.
Do solar sliding gate openers work in Western Washington?
Check the specific operator before assuming so. LiftMaster’s RSL12UL manual, for example, says solar installations are not supported in northern climates because of cold and short winter days, and not in areas with long periods of heavy fog or rain. Where solar is used, panels face due south, clear of winter shade, and are sized for December.
What happens to a sliding gate when the power goes out?
A battery-run operator keeps cycling on its battery for a time. When the battery is also low, the board follows its setting: stay at a limit, or open and stay open, which some fire agencies require. A gear-driven operator with no battery holds the gate shut until someone uses the keyed manual release.