
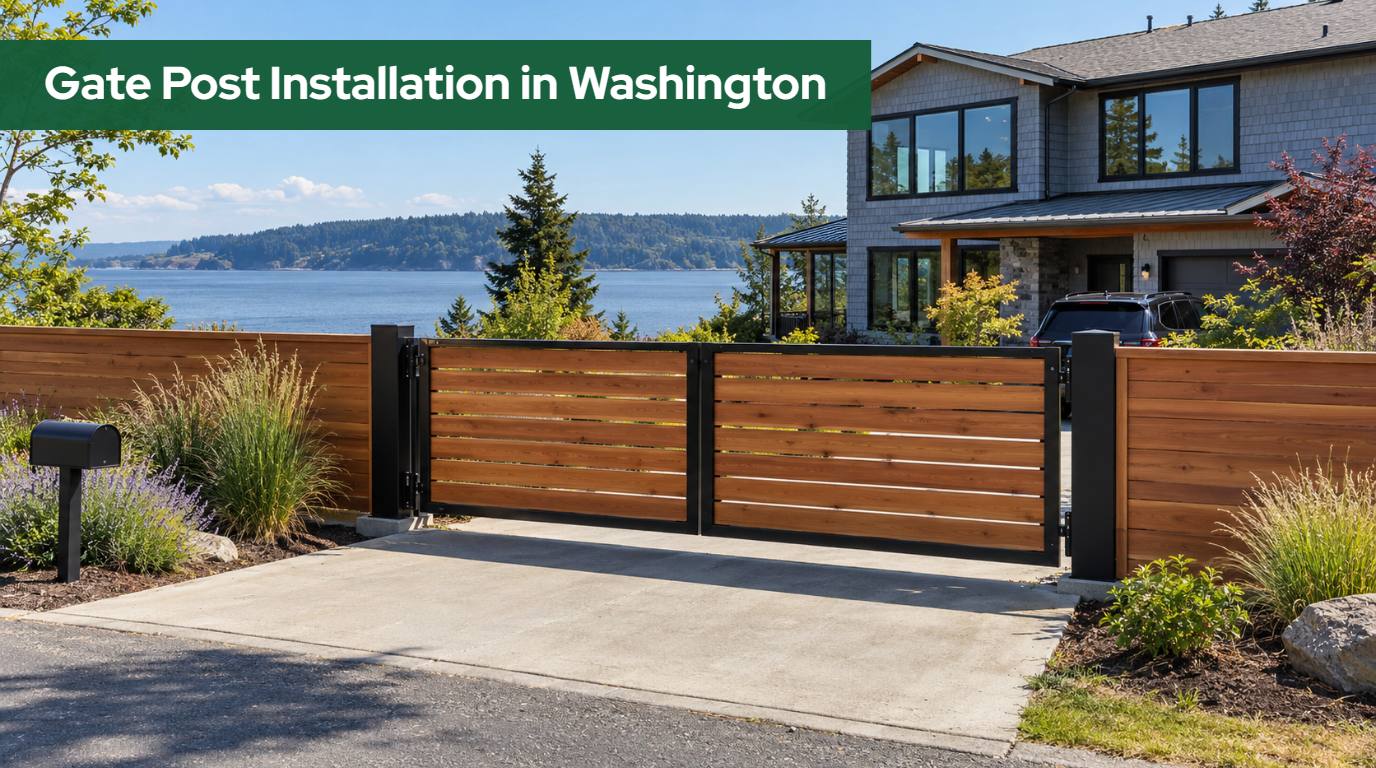
A gate is only as good as the two posts it hangs between. If a post leans, heaves or twists, the gate drags, the latch stops catching and an automatic operator starts working against the gate instead of moving it. That is why gate post installation in Washington deserves as much planning as the gate itself. The posts carry the weight of the leaf, the leverage of a long swing, the push of an operator and the wind load on a solid panel, all while sitting in soil that stays wet for much of the year west of the Cascades.
This guide walks through what goes into setting gate posts that stay plumb: the call to 811 that Washington law requires before digging, how deep the footings should go and where the local frost line comes from, how to size a footing for real soil, how to choose between steel, wood and masonry, and how posts change when the gate is automated. It is written for homeowners, farm and acreage owners, HOA boards and property managers in Skagit, Whatcom, Snohomish, Island, San Juan, King and Pierce counties.
Quick answer
Gate post installation in Washington starts with an 811 locate request at least two full business days before digging, as RCW 19.122 requires. Footings go below the local frost line, which Skagit County and several nearby jurisdictions list as 12 inches, and are sized deeper and wider for the gate’s weight, swing and operator.
In this guide
- What gate post installation in Washington involves
- Why the posts decide how the gate works
- Calling 811 before you dig: what RCW 19.122 requires
- How deep should gate posts be in Washington?
- Sizing the footing for real Washington soil
- Steel, wood or masonry: choosing the post
- Hinge post, latch post and the gaps between them
- Posts for automatic gates: pad mount or post mount
- Posts and footings for slide and cantilever gates
- Slopes, paving and distance from the road
- Wind, rain and salt air
- Permits, property lines and approvals
- Replacing or reinforcing existing gate posts
- A gate post installation checklist
- How we approach gate post installation
- Frequently asked questions
What Gate Post Installation in Washington Involves
Setting a gate post looks simple from the street: dig a hole, stand a post in it, pour concrete. The work that decides whether the gate still swings true in ten winters happens before the concrete truck arrives. The layout has to match the gate that will hang on the posts, the hole has to clear buried utilities, the footing has to reach below the frost line and into soil that can carry the load, and the post has to be set plumb and at the right height so the hinges, latch and operator brackets line up.
In practice, a gate post installation in Washington usually includes these steps:
- Confirming the opening: the clear width the gate needs, the swing direction or slide path, and where the posts sit relative to the property line and the road.
- Marking the dig area and submitting an 811 locate request, then waiting for the utility marks before any digging.
- Choosing the post: steel tube, timber or a masonry pillar with a structural core, sized for the gate’s weight and width.
- Sizing the footing for the local frost line, the soil and the leverage of the gate.
- Placing conduit for power, loops, sensors and access control before the concrete is poured.
- Setting the posts plumb and at the correct spacing, bracing them, and letting the concrete cure before the gate’s weight goes on.
Why the Posts Decide How the Gate Works
A swing gate is a lever. The weight of the leaf hangs out from the hinge post, so the post feels a constant pull at the top hinge and a push at the bottom hinge. The wider and heavier the leaf, the bigger that pull. When the post or its footing gives a little, the far end of the gate drops a lot more, and the latch side starts to drag.
Automatic operators make the posts even more important. LiftMaster’s installation manual for its LA412 residential swing operator spells out the conditions before the operator goes on: the gate must be level, the gate and gate post must be plumb, the gate must swing freely and be supported entirely by its hinges, and it must not drag across the ground. An operator is built to move a gate that hangs correctly, not to hold up one that is sagging. When a post leans, the operator works harder on every cycle, its force settings creep up, and the safety reversal becomes less predictable.
Posts also set the geometry for safety. The same manual says there should be no more than 4 inches from the center of the hinge to the edge of the post or column, and that if the distance is greater, entrapment protection is required for that area. If you are already dealing with a gate that drops, our guide to sagging gate repair in Washington explains how to tell a post problem from a hinge or frame problem.
Calling 811 Before You Dig: What RCW 19.122 Requires
Gate posts go in exactly where utilities like to run: along the front of the property, near the driveway, close to the road. Power, water, gas, fiber, cable and irrigation lines often cross the strip where the gate will stand. Washington’s underground utility damage prevention law, chapter 19.122 RCW, sets the rules for digging there.
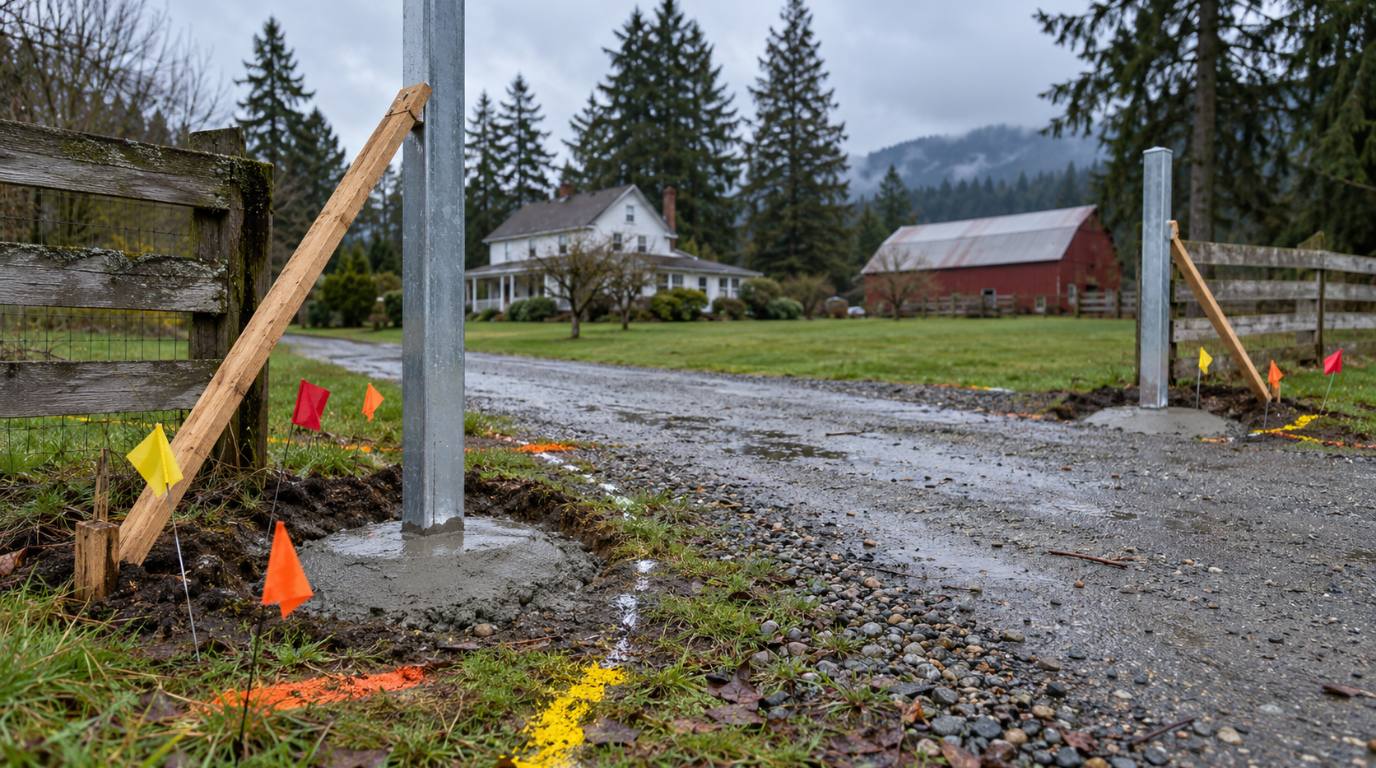
Under RCW 19.122.030, before starting any excavation, the excavator must mark the boundary of the excavation area with white lining, or white pin flags when necessary, and give notice of the scheduled start of excavation to all facility operators through a one-number locator service. The notice has to go in not less than two full business days and not more than 10 full business days before the scheduled work-to-begin date. In Washington, the one-number locator service is reached by dialing 811 or by submitting a request online.
A few details in the law matter for a gate project:
- Business days do not include weekends or holidays. The statute defines a business day as any day other than Saturday, Sunday or a legal local, state or federal holiday. A request made on a Friday afternoon does not clear you to dig on Monday morning.
- Marks expire. A facility operator’s markings expire 45 calendar days from the date the excavator gave notice. If the project stalls, a new request may be needed before digging resumes.
- “Excavation” is broad. The law defines it as any operation in which earth, rock or other material on or below the ground is moved or otherwise displaced by any means. Augering a post hole counts.
- The shallow-dig exemption does not cover post holes. RCW 19.122.031 exempts excavation of less than 12 inches in depth on private noncommercial property when done by the owner or occupant. A gate post footing goes deeper than that.
Two more points from experience. First, 811 locates mark utilities owned by the utility companies, usually up to the meter. Lines the property owner installed, such as power to a barn, a well line, a septic line or the low-voltage feed to an existing gate, are private and are not marked by the locate request. Those need to be found another way, often with a private locator or from the original installer’s records.
When we are the excavator on a gate project, the locate request is ours to make. If you are setting posts yourself, the duty is yours.
How Deep Should Gate Posts Be in Washington?
There are two answers to “how deep should gate posts be,” and both apply. The first is a minimum set by the climate: the footing should reach below the frost line, so freezing soil cannot lift it. The second is set by the gate: the footing has to be deep and wide enough to resist the overturning force of the leaf, the wind and the operator. For many driveway gates, the second answer is the one that controls.
Where the frost line comes from
Washington adopts the International Residential Code statewide as the Washington State Residential Code, and Table R301.2 in that code is where each jurisdiction lists its climatic and geographic design criteria. A footnote to the table says the jurisdiction shall fill in the frost line depth column with the minimum depth of footing below finish grade. In other words, the frost depth is not a single statewide number. Each county or city building department publishes its own.
For much of Western Washington, the published number is shallow compared with colder parts of the country:
| Jurisdiction | Frost line depth listed | Where it is published |
|---|---|---|
| Skagit County | 12 inches | County GIS design criteria layer (snow, wind, seismic and soil), which also lists an assumed soil bearing capacity of 1,500 psf |
| Island County | 12 inches | County copy of 2021 Washington State Residential Code Table R301.2 |
| City of Lake Stevens (Snohomish County) | 12 inches | 2021 IRC Table R301.2(1) design criteria sheet |
| Other cities and counties | Set locally | The building department’s design criteria table; confirm for your address |
You can check the Skagit County values on the county’s snow, wind, seismic and soil design criteria map. Lake Stevens publishes its design criteria sheet with a 12-inch frost line depth. Whatcom, King, Pierce and San Juan jurisdictions each publish their own tables, and higher-elevation sites inside a county can face colder conditions than the valley floor, so confirm the number for the address rather than assuming.
Why 12 inches is rarely enough for a gate post
A 12-inch frost line tells you how deep freezing soil can reach. It does not tell you how much embedment a post needs to stay plumb under a heavy gate. A house footing carries mostly downward load. A gate post carries a sideways load high above the ground, which tries to rotate the post and its footing like a lever. Resisting that takes depth and width, and the numbers grow with the gate’s weight, its width, how solid the panel is and whether an operator is pushing on it.
So a gate post footing is designed for the gate, with the frost line as the floor, not the target. For large or heavy gates, follow the equipment’s installation instructions and local building codes, and bring in an engineer when the gate is beyond the ordinary.
Not sure how deep your gate posts need to go?
We look at the gate you want, the soil on your site and the operator it will carry, then size the posts and footings before anything is dug.
Sizing the Footing for Real Washington Soil
The same post can hold in one yard and lean in the next because the soil is different. In the river valleys of Skagit and Whatcom counties, a lot of ground is fine silt and clay that stays saturated through the wet season. On glacial till in parts of Snohomish and King counties, a post hole can hit dense, rocky material a couple of feet down. Island and San Juan sites can be sandy, rocky or both. A footing that ignores the soil is a guess.
Skagit County’s design criteria list an assumed soil bearing capacity of 1,500 psf, the default used when there is no soil report. That is a conservative starting point, and it reflects the fact that a lot of local soil is not especially strong when wet. For gate footings, wet, soft soil means the footing needs more surface area pushing against the soil to resist the gate’s leverage.
What changes the footing size
- Gate weight and leaf width. The farther the weight hangs from the hinge post, the more the footing has to resist rotation.
- Solid or open panel. A solid cedar or steel sheet panel catches wind like a sail. An open picket or mesh panel does not.
- Operator force. A swing operator pushes against the post or its pad on every cycle, and a stop or a closing leaf can bring sudden loads.
- Soil and water. Soft, wet soil needs a wider footing. A high winter water table can soften the soil around a footing that was firm in August.
Drainage around the post
Water is the quiet enemy of a gate post. A wood post sitting in a concrete cup that holds water will rot at the grade line. A steel post with water pooling at its base will corrode exactly where it is hardest to see. Good practice is to crown the top of the concrete so water runs away from the post, keep the top of the footing at or slightly above grade instead of below a dirt cap, and avoid trapping water against the post. On a wet site, a gravel base under the footing and a path for surface water to run away from the post both help.
Curing matters too. The gate should not hang its full weight on the posts, and an operator should not start cycling against them, until the concrete has gained enough strength. The concrete product’s own data gives the cure time, and cold, wet weather slows it down. Bracing the posts plumb until the concrete has set keeps a careful layout from drifting while it cures.
Steel, Wood or Masonry: Choosing the Post
The post material is chosen for the gate, the look and the setting. Each option has its own installation details.
| Post type | Where it fits | Installation notes |
|---|---|---|
| Square or round steel tube | Automatic driveway gates, heavy swing gates, slide gates, commercial gates | Sized for the gate; can be fabricated with hinge and operator brackets welded on; needs a coating system suited to wet or salt air sites |
| Timber (cedar or treated) | Pedestrian gates, light garden gates, farm gates that match a wood fence | Moves with moisture; rot starts at the grade line; best for lighter gates, with steel or a steel sleeve for heavy leaves |
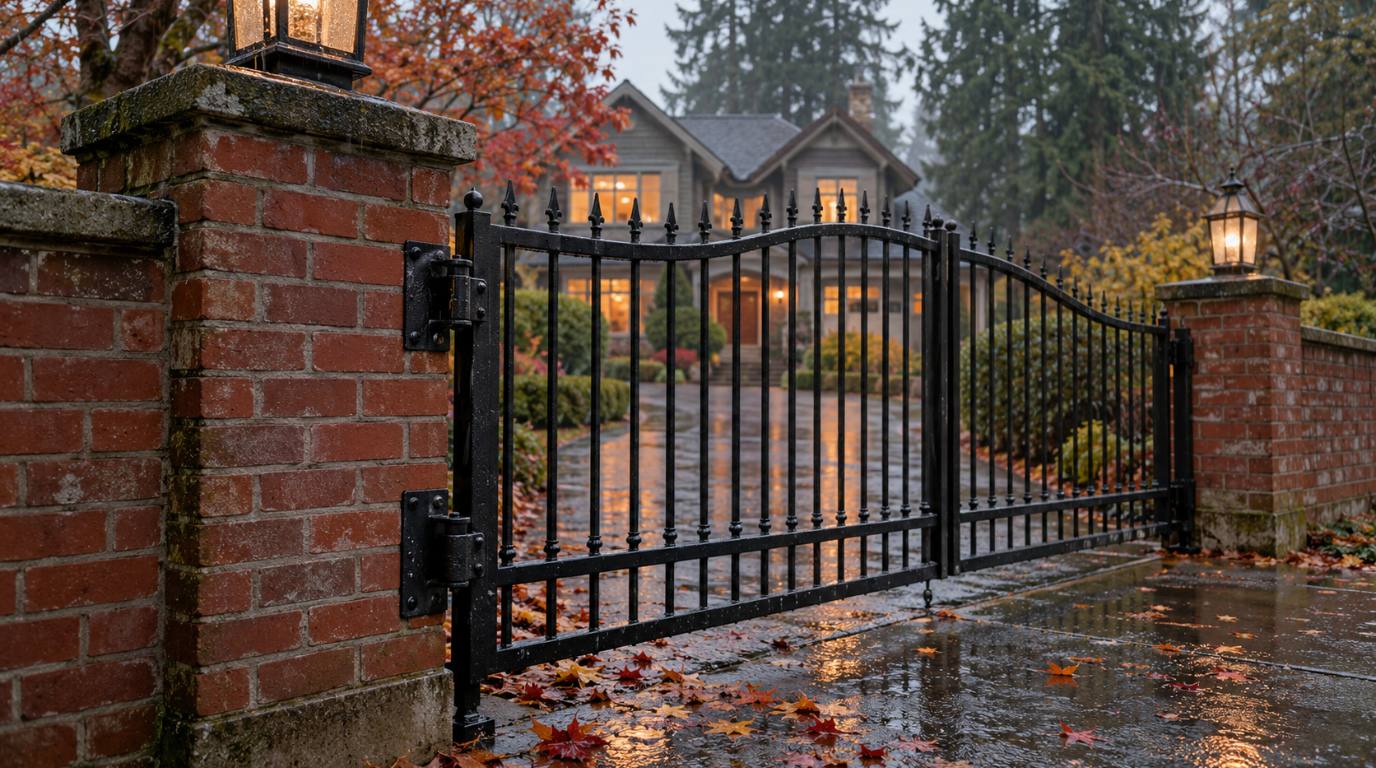
| Brick, stone or block pillar | Estate and formal entrances | The masonry needs a structural core, typically steel or reinforced, tied to the footing; hinges anchor to the core, not just to the veneer |
Steel posts
Steel is the default for driveway gates, especially automatic ones. A steel post can be sized to the gate’s weight and width, and in a shop the hinge plates, latch keepers and operator brackets can be welded on at the right heights before the post goes into the ground. That is one reason we fabricate posts and gates together in our Sedro-Woolley shop. Steel needs protection from corrosion, which matters most where rain, fertilizer, de-icing materials or salt air reach the base of the post.
Wood posts
Wood works for light gates and for farm and garden gates that match a wood fence, but every wood post eventually fails at the grade line, where it stays wet and gets air. For a heavier wood gate, a common approach is a steel post hidden inside a wood cladding, so the look is wood and the structure is steel. Our page on wood gate installation and repair covers more of how wood gates hold up here.
Masonry pillars
Brick and stone pillars look substantial, but the brick or stone itself is not what holds the gate. A gate hung from masonry needs a structural core inside the pillar, tied into a footing below, with the hinges anchored to that core. A pillar built as a hollow veneer box with hinges screwed into mortar joints will crack and lean under a heavy gate. If you are planning a stone or brick entrance, the pillar design and the gate design should be done together. Our custom gate design page explains how we plan stone-coordinated gates.
Hinge Post, Latch Post and the Gaps Between Them
The two posts in a gate opening do different jobs. The hinge post carries the gate. The latch post, or the center stop on a double gate, catches it. Treating them as identical leads to one overbuilt post and one underbuilt one.
The hinge post
The hinge post takes the gate’s full weight plus its leverage, so it gets the larger section and the bigger footing. The hinge positions decide how the gate hangs: hinges spaced well apart along the post handle the load better than hinges bunched near the middle.
The latch post and center stop
The latch post has a lighter job, but it still has to hold the latch at the right height and resist a gate that is pushed or blown shut. On a double swing gate, the two leaves usually meet at a center stop set into the driveway or at a drop rod that goes into a sleeve in the concrete. That stop or sleeve is part of the post layout and should be set at the same time.
Gaps and safety
Post placement fixes several gaps for good. The gap between the hinge side of the gate and the post is a pinch point; on automatic gates, the LA412 manual’s 4-inch limit from hinge center to the post edge is one example of how manufacturers address it. The opening between posts, minus the hardware, sets the clear width that vehicles, trailers and fire apparatus have to fit through. If the clear width matters for your property, our guide on how wide a driveway gate should be walks through the layout.
Posts for Automatic Gates: Pad Mount or Post Mount
An automatic swing gate adds a third structural piece to the layout: the operator’s mounting point. Swing operators mount in one of two ways, and each changes what the post and footing need.
Post-mounted operators
Many residential linear actuators and some articulated arms bolt to a bracket on the hinge post, a short distance from the hinge. Every time the operator pushes the gate open, it also pushes back against that post. The post and footing have to handle the gate’s weight plus the operator’s force without flexing. LiftMaster’s LA412 manual shows the post bracket mounted to the gate post and gives the bracket location from the hinge, which is why the bracket position is worked out before the post is set and why a welded bracket on a fabricated steel post is often the cleanest solution.
Pad-mounted operators
Heavier commercial swing operators often sit on their own concrete pad beside the hinge post, so the operator’s torque goes into a mass of concrete instead of into the post. Other heavy operators follow the same pattern; DoorKing’s installation manual for its 1601 and 1602 barrier gate operators, for example, specifies a new concrete pad with a minimum height and says the pad’s underground depth is determined by soil conditions and local building codes, with reinforced concrete recommended. The pad and the hinge post footing are planned together, so the operator arm geometry works and the two pours do not interfere with each other.
Conduit before concrete
The best time to plan wiring is before the posts are poured. An automatic gate typically needs power to the operator, low-voltage wire between the operator and any second leaf, wiring for photo eyes and edges, a run to the keypad or intercom pedestal, and often vehicle loops. Sleeves or conduit stubbed through or beside the footing at this stage save cutting concrete later. Our guides to the swing gate opener in Washington and to gate photo eye installation show where those devices usually sit, which tells you where the conduit needs to land.
Planning an automatic gate from the ground up?
We lay out the posts, the operator mount and the conduit together, so the gate, the motor and the safety devices fit the first time.
Posts and Footings for Slide and Cantilever Gates
Slide gates spread the load differently than swing gates, so their posts and footings look different too.
A V-track slide gate rides on wheels along a track set in or on the driveway. The gate’s weight goes mostly into the track and the concrete under it, while the posts at each end act as guides and stops. The track foundation needs to be level and continuous, and on a wet site it needs to drain, because a track that settles or floods causes most of the trouble with this type of gate.
A cantilever slide gate has no track across the opening. The gate hangs from rollers mounted on two or more support posts beside the opening, with a counterbalance section that extends behind them. Those roller posts carry the whole gate as a cantilever, so their footings take large overturning loads and have to be designed for it. The operator usually sits on its own pad next to the roller posts. Our guide to cantilever gate installation in Washington explains the layout, including the space behind the opening that the gate needs.
Slopes, Paving and Distance From the Road
Setting posts on a slope
A sloped driveway changes the post layout. A swing gate that opens uphill can hit the grade before it fully opens, so the hinge post height, the hinge type and the gate’s bottom profile are planned together. Sometimes the answer is a slide gate on a level beam instead. Our guide to the driveway gate on a slope walks through the options. Whatever the gate type, posts on a slope still need to be plumb, which means the footing tops and the finished grade will not line up the same on both sides.
Before or after paving
The cleanest time to set gate posts is before the driveway is paved. Footings, pads, track foundations, loops and conduit can all go in while the base is open, and the paving crew finishes around them. Setting posts after paving means cutting and patching. If a new driveway is in your plans, our article on planning an automatic gate before paving covers the sequence.
Distance from the road
A gate set right at the road edge forces visitors, delivery trucks and fire engines to stop in the travel lane while it opens, and fire agencies set rules for gates on access roads. Our guide to fire department gate access in Washington explains what local agencies look for. Deciding the setback before setting posts avoids moving them later.
Wind, Rain and Salt Air
Western Washington weather tests gate posts in three ways.
Wind. The same Table R301.2 that lists frost depth also lists a design wind speed. Skagit County’s design criteria map lists 85 mph, and the Lake Stevens design sheet lists 110 mph as a 3-second gust. The two tables are not directly comparable, but both make the same point: wind is a design load, not an afterthought. A solid gate on an exposed site, such as open farmland in the Skagit flats or a waterfront lot on Whidbey or Camano, catches a lot of wind, and that load goes straight into the posts. More open panel designs, heavier posts and larger footings all help.
Salt air. On the islands and along the shoreline, salt air speeds up corrosion of steel posts and hardware. Galvanizing, a proper coating system and stainless or coated fasteners help steel last. Our guide to the best gate materials in Anacortes and our broader article on gate materials for Washington weather cover how different materials and finishes hold up.
Permits, Property Lines and Approvals
Whether a gate and its posts need a permit depends on the jurisdiction, the height of the gate and fence, the location and whether the gate is automated. An automatic gate adds electrical work, and electrical work in Washington falls under the state electrical rules administered by the Department of Labor and Industries. A gate across a fire apparatus access road needs fire code approval. Our overview of gate permits in Washington State explains the common cases.
The post location itself raises a few questions that are easy to overlook:
- Property line. The posts and footings, including the part of the footing below ground, need to be on your property unless you have an agreement or easement that says otherwise. On rural parcels, the actual line is not always where the old fence runs. A survey settles it.
- Right-of-way. Many driveways cross a strip of public right-of-way between the road and the property line. Posts generally should not go there without the road authority’s permission.
- Easements. Utility and access easements can restrict what you build in them, including posts, footings and gates that block shared access.
- Shared driveways and HOAs. A gate on a private road or shared drive usually needs agreement from the other users or the HOA board, and their own rules may set the design.
Want the layout settled before the first hole?
On a free site visit we check the opening, the property line clues, the slope and the access needs, and we plan where the posts should go.
Replacing or Reinforcing Existing Gate Posts
Many gate post jobs start with an existing gate that drags, or a manual gate the owner wants to automate on posts that were never set for it. The question is whether the posts can be saved.
Signs that a post is the problem, not the gate or hinges, include a visible lean, cracked or tilted concrete at the base, a gap opening between the post and the soil, rot or rust at the grade line, and a gate that sags more after a wet winter. A post that has rotated in its footing usually cannot be pushed back and stay there; the footing itself has moved.
Typical options, depending on what we find:
- Reset the post in a new, larger footing when the post is sound but the footing is too small or too shallow.
- Replace the post when it is rotted, rusted through or undersized for the gate.
- Add a pad or new mounting point for an operator, rather than hanging new loads on an old post.
When an owner wants to automate an existing manual gate, we always check the posts first. Our gate automation retrofit page explains what else we look at before adding an operator. And because replacing a post usually means digging, the 811 rules apply to repairs just as they do to new work.
A Gate Post Installation Checklist
Before posts go in, these are the questions worth answering:
- The gate: What type, width, weight and panel style? Will it be automated now or later?
- The opening: What clear width do vehicles, trailers and fire apparatus need? Which way does the gate swing, or where does it slide?
- Locates: Has the dig area been white lined and the 811 request submitted at least two full business days before digging? Are private lines like well, septic, barn power or old gate wiring accounted for?
- Frost line and soil: What frost depth does the local building department list? Is the soil wet, soft, rocky or sandy?
- Footing: Is the footing sized for the gate’s leverage and wind load, not just the frost line? Does it drain?
- Posts: Steel, wood or masonry with a structural core? Hinge, latch and operator bracket heights set?
- Automation: Pad or post mount? Conduit for power, low voltage, loops, sensors and access control placed before the pour?
- Site: Slope, paving schedule, distance from the road and drainage settled?
- Approvals: Property line, right-of-way, easements, HOA, fire access and permits checked?
- Cure and set: Posts braced plumb, and the gate hung only after the concrete has cured enough?
How We Approach Gate Post Installation
Emerald Gate Systems is a family-owned gate company based at 7557 Alpine Lane in Sedro-Woolley, in Skagit County. We design, fabricate in our own shop, install, automate and service residential, farm and commercial gates across Skagit, Whatcom, Snohomish, Island, San Juan, King and Pierce counties. Because the same team handles CAD planning, welding, installation, automation, access control, testing and future service, the posts are designed for the gate that will hang on them, not picked from a yard after the fact.
On a gate post project, we start with a free on-site consultation. We look at the opening, the slope, the soil, the road and the access needs, and we talk through the gate you want. We size posts and footings for that gate, plan the operator mount and conduit if the gate will be automated, and make the 811 locate request before digging. Posts are often fabricated with hinge plates and operator brackets in place, and we work in hand-forged wrought iron, laser-cut steel and Western Red Cedar, including stone-coordinated designs. We install and service LiftMaster, Viking and FAAC gate operators and access control including keypads, intercoms, telephone entry, card readers and license plate recognition. For new gates, our automatic gate installation page explains the full process.
Washington requires contractors to show their registration in advertising: Emerald Gate Systems is registered with the Washington State Department of Labor and Industries as a construction contractor (EMERAGS748D6) and holds an electrical contractor license in the Doors and Gates specialty (EMERAGS747KE).
Frequently Asked Questions
How deep should gate posts be in Washington?
Below the local frost line at a minimum, and usually deeper. Skagit County, Island County and the City of Lake Stevens list a 12-inch frost line, but a driveway gate post resists the leverage of the gate, wind and any operator, so its footing is sized for that load. Heavy or wide gates need deeper, wider footings than a garden gate.
Do I need to call 811 before setting gate posts in Washington?
Yes. RCW 19.122.030 requires the excavator to white line the dig area and notify utilities through the one-number locator service, 811, at least two full business days before digging. The exemption for shallow digs covers less than 12 inches on private noncommercial property, which a gate post footing exceeds.
What size post do I need for a driveway gate?
It depends on the gate’s weight, leaf width, panel style and whether an operator will push on it. Light pedestrian gates can hang on timber, while most driveway gates, and nearly all automatic ones, use steel posts sized to the gate. We size posts and footings together after seeing the gate design and the site.
Can I hang a gate on an existing fence post?
Usually not a driveway gate. Fence posts are set for the fence’s own load, not for a swinging leaf that pulls on its hinges. Small garden gates can sometimes use a reinforced fence post, but a driveway or automatic gate generally needs a dedicated post and footing sized for the gate.
How long should concrete cure before hanging a gate?
Follow the cure time published by the concrete product you use, and allow longer in cold, wet weather. Keep the posts braced plumb while the concrete sets, and wait to hang the full weight of the gate and to start an operator until the concrete has gained enough strength to carry the load.
Can brick or stone pillars hold a heavy gate?
Yes, when the pillar has a structural core, typically steel or reinforced, tied to a footing below, with the hinges anchored to that core. Hinges screwed into a hollow veneer or into mortar joints tend to loosen and crack the masonry, so pillars and gates are best designed together.